
Optical Leveling You Can See | RONE 2A Complete Guide · 3 min · Watch on YouTube
1Welcome to RONE 2A
RONE 2A is a model of the classic tube optical leveling amplifier, fitted to measurements of the silver unit. In the original a light shines on a photocell; the louder the signal, the brighter the light and the more the cell turns the level down. That cell is slow and lazy in a musical way: it grabs gently, lets go in two stages and depends on what came before - which is why it levels a vocal or a bass without you hearing it work.
There are only two knobs. PEAK REDUCTION sets how hard the cell pulls down, GAIN sets the level that leaves. Press SCOPE and the window grows downwards: a scope draws the output wave and the gain reduction locked to the bars of your song.
Where it shines
- Vocals - smooth leveling that keeps the performance natural.
- Bass - an even, round low end.
- Mix bus and groups - a dB or two of glue.
- Pads and strings - slow, breathing control.
The 10-second version
- Insert RONE 2A on a vocal or bass.
- Leave the switch on COMPRESS.
- Turn PEAK REDUCTION up until GR moves 3-6 dB.
- Bring the level back with GAIN.
2Installation with the RONE Plugins Center
Every RONE product is installed, updated and licensed through one application: the RONE Plugins Center. You never download individual installers by hand, and you never enter serial numbers into the plugin itself.
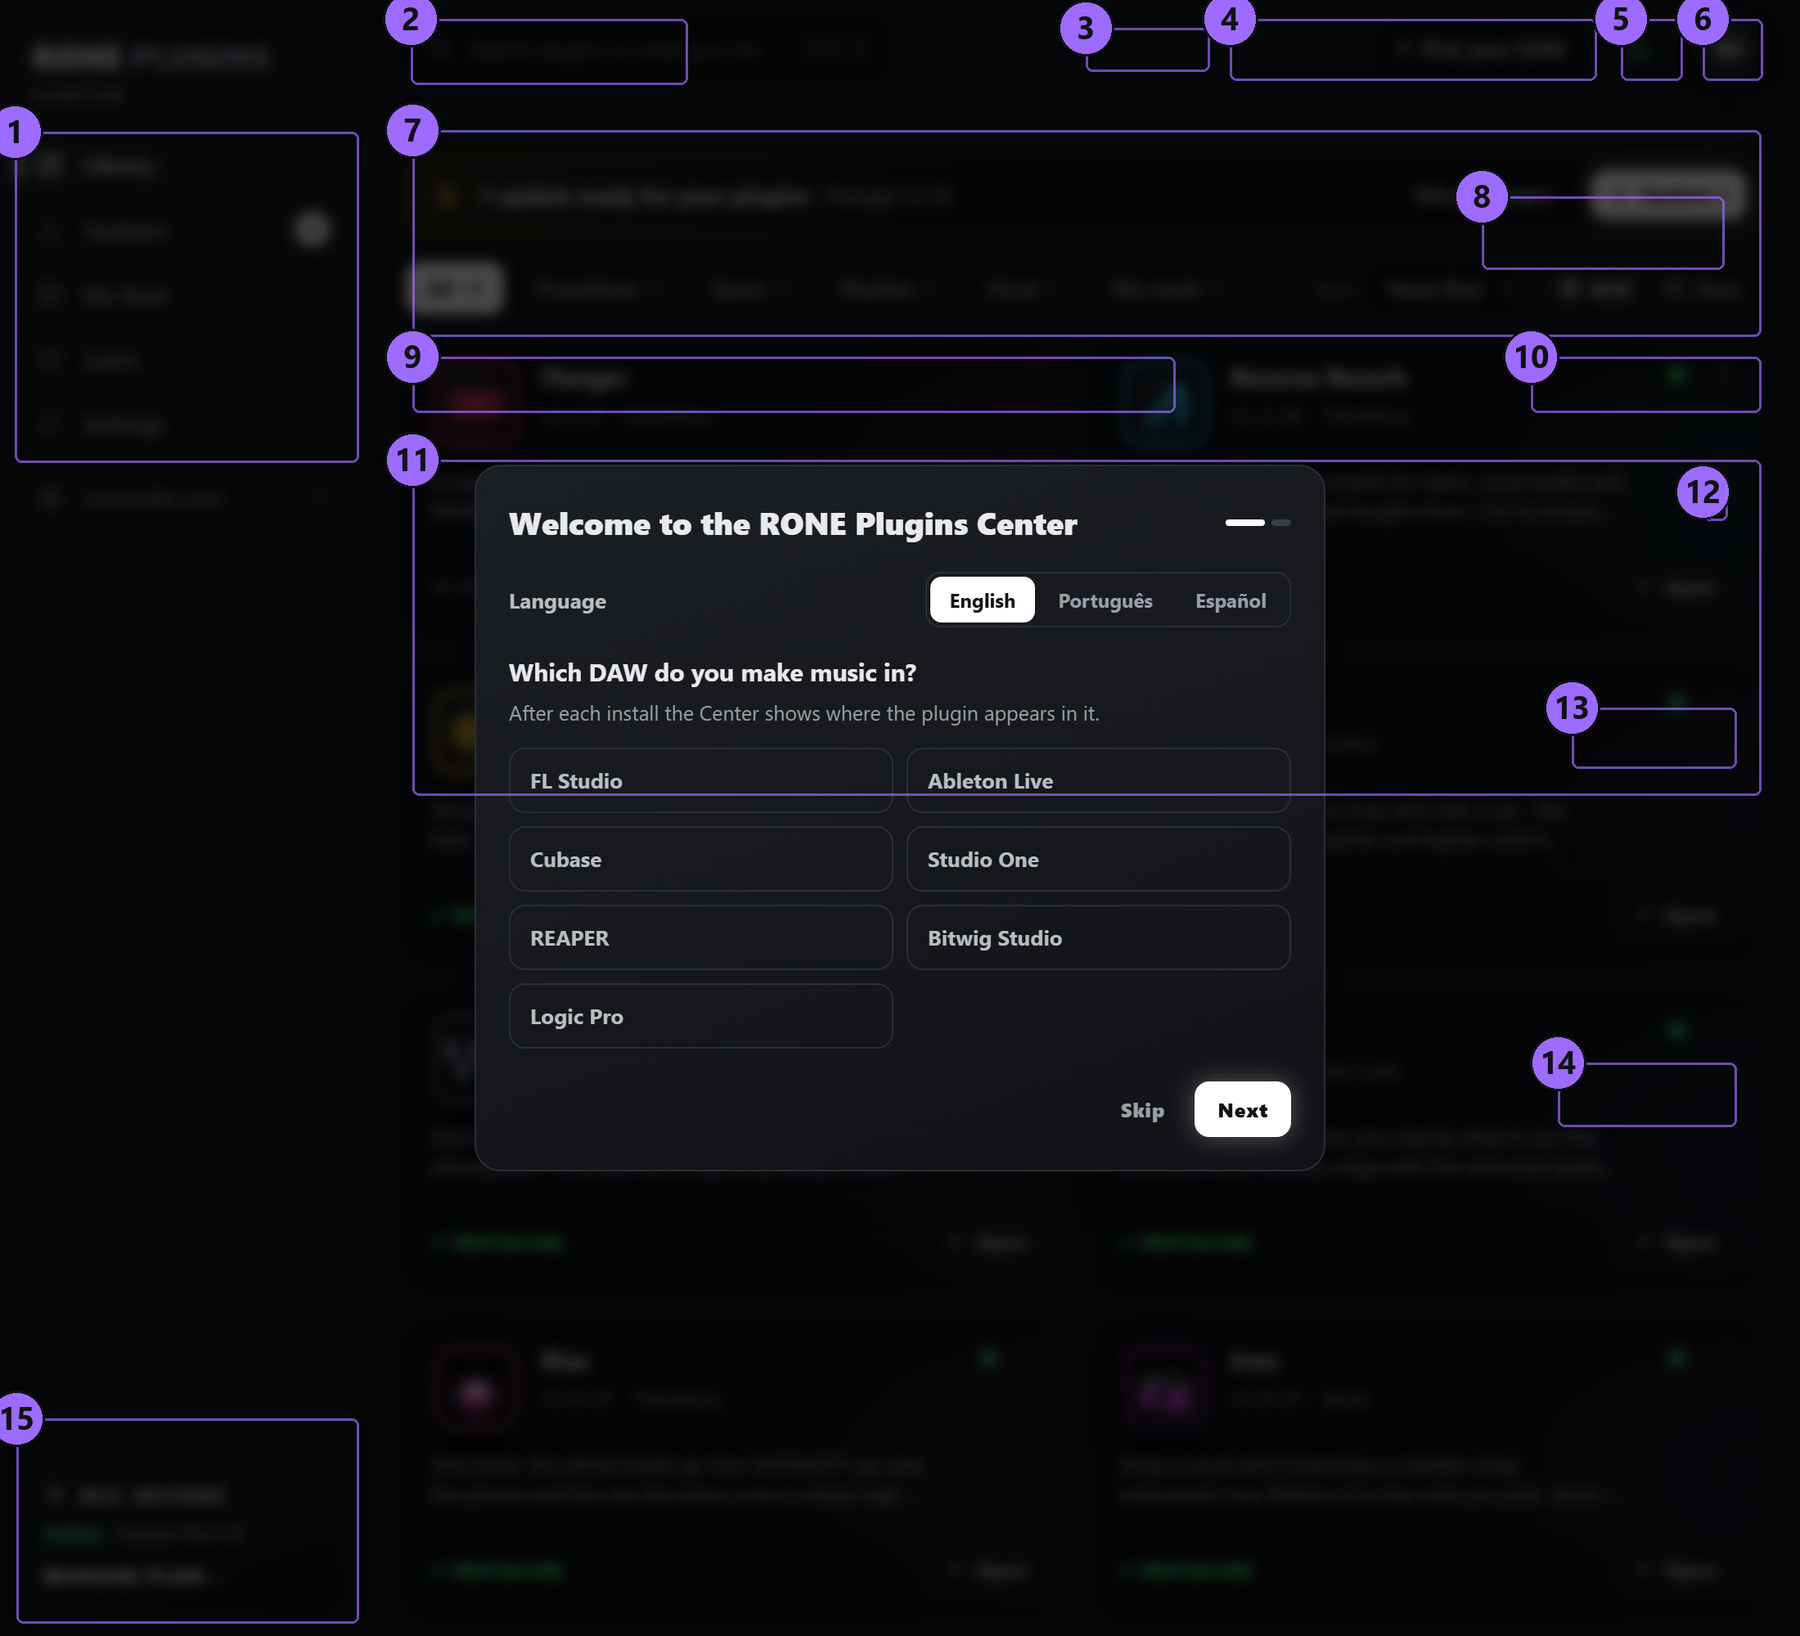
Step by step
- Download the Center from roneaudio.com and run the installer (Windows:
RONE_Plugins_Center_Installer.exe, macOS:RONE_Plugins_Center.dmg). On Windows the installer also adds the Microsoft WebView2 runtime if your PC does not have it yet; it is required for the plugin interfaces. On macOS (10.15 Catalina or later, Intel and Apple Silicon) open the .dmg and drag the Center onto Applications. It is signed and notarized by Apple, so macOS only asks once whether you want to open an app downloaded from the internet: press Open. - Open the Center and sign in with your roneaudio.com account (the same e-mail and password you used on the website). Your licences and device slots are checked automatically: an active ALL ACCESS plan unlocks every plugin. RONE 2A is included in ALL ACCESS, so an active plan opens it.
- Find RONE 2A in the list and press INSTALL. The Center downloads the signed installer, verifies its checksum, installs it silently and registers the version.
- When the card shows INSTALLED, start (or restart) your DAW and rescan plugins if it does not pick up new plugins automatically. All RONE plugins appear next to each other in your plugin list because every name starts with RONE.
- Updates appear on the same card. Press UPDATE on one plugin or UPDATE ALL at the top. Close the standalone version of a plugin before updating it.
Where the files go
Windows
| File | Location |
|---|---|
| VST3 | C:\Program Files\Common Files\VST3\RONE\RONE 2A.vst3 |
| Standalone app | C:\Program Files\RONE Plugins\RONE 2A.exe |
| This manual | C:\Program Files\RONE Plugins\Manuals\ |
macOS
| File | Location |
|---|---|
| VST3 | /Library/Audio/Plug-Ins/VST3/RONE 2A.vst3 |
| Audio Unit | /Library/Audio/Plug-Ins/Components/RONE 2A.component |
| Standalone app | /Applications/RONE 2A.app |
| This manual | /Users/Shared/RONE Plugins/Manuals/ |
Licence and activation
Licensing is tied to your account, not to a key. The plugin checks the licence file that the Center writes when you sign in. RONE 2A is included in an ALL ACCESS plan and opens for as long as the plan is active; it is not sold as a separate lifetime licence.
If a plugin ever shows a RONE Bundle License Required screen, open the Center, make sure you are signed in and the plugin shows as licensed, then reopen it. Two devices can be signed in at the same time; sign out on an old machine from the Center's Account page to free a slot. The Center needs to reach the internet now and then to confirm your plan.
Uninstalling
Windows: Settings → Apps → RONE 2A (RONE). macOS: delete the bundles listed above. Presets and settings in your user folder are kept.
3Quick start
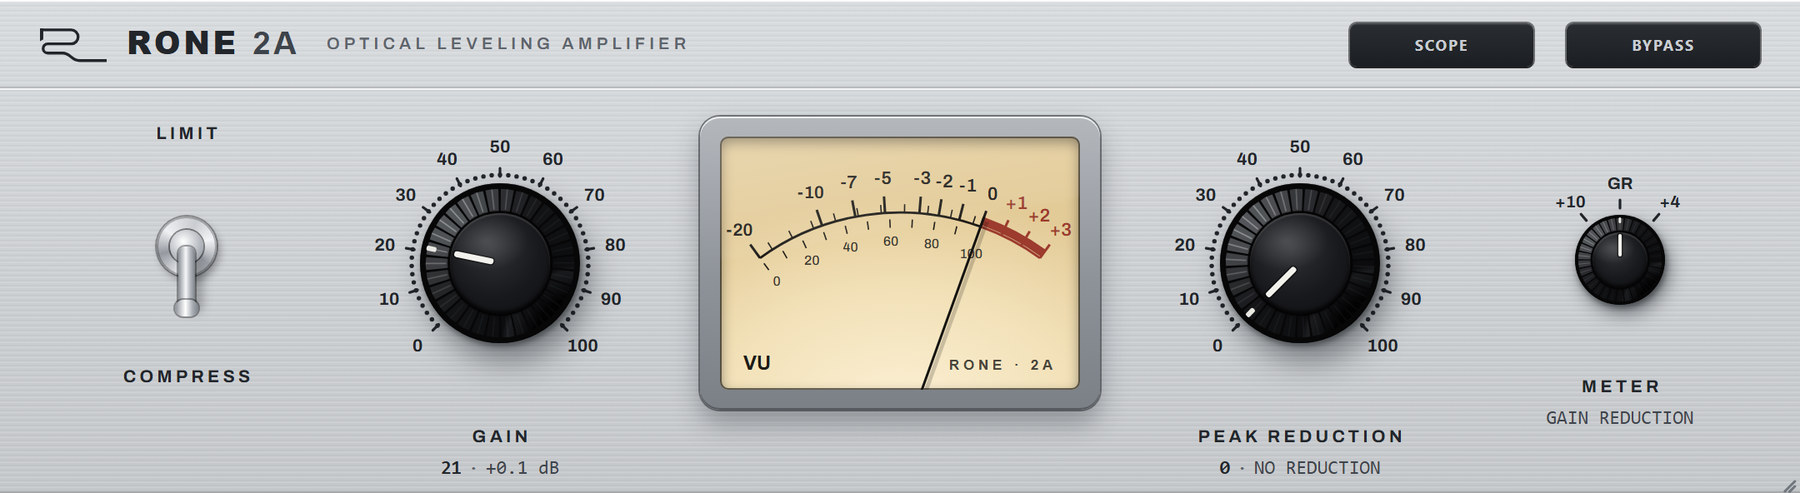
- Insert RONE 2A on a track or bus. With PEAK REDUCTION at 0 it does not compress.
- Turn PEAK REDUCTION up while the meter shows GR, until the loud parts come down 3-6 dB.
- Bring the level back with GAIN so the bypassed and processed signal are about as loud, then compare with BYPASS.
- Flip to LIMIT if you want it firmer: a higher ratio for the peaks, same smooth cell.
4Interface tour
5Controls reference
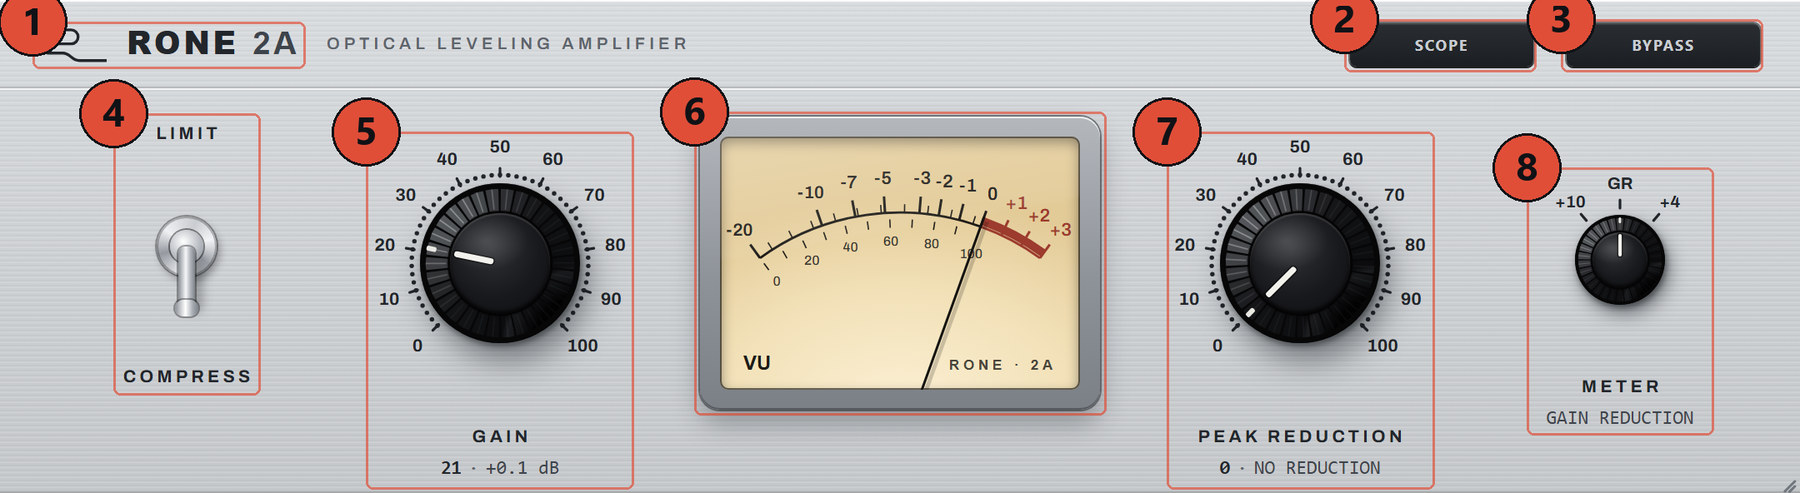
How much the signal drives the light, and so how hard the cell pulls the level down. At 0 there is no reduction. Like on the hardware there is no threshold, attack or release: the cell's own timing follows the material.
The output amplifier - the make-up gain. It does not change how much the unit compresses. The readout shows the dial position and the real gain in dB.
COMPRESS is the gentle, low-ratio leveling the unit is known for. LIMIT raises the ratio so the peaks are held more firmly.
What the VU meter shows. GR: gain reduction in dB. +10 and +4: the output level, with 0 VU at +10 or +4 dBu as on the hardware.
Takes the whole unit out of the path. Lit = bypassed.
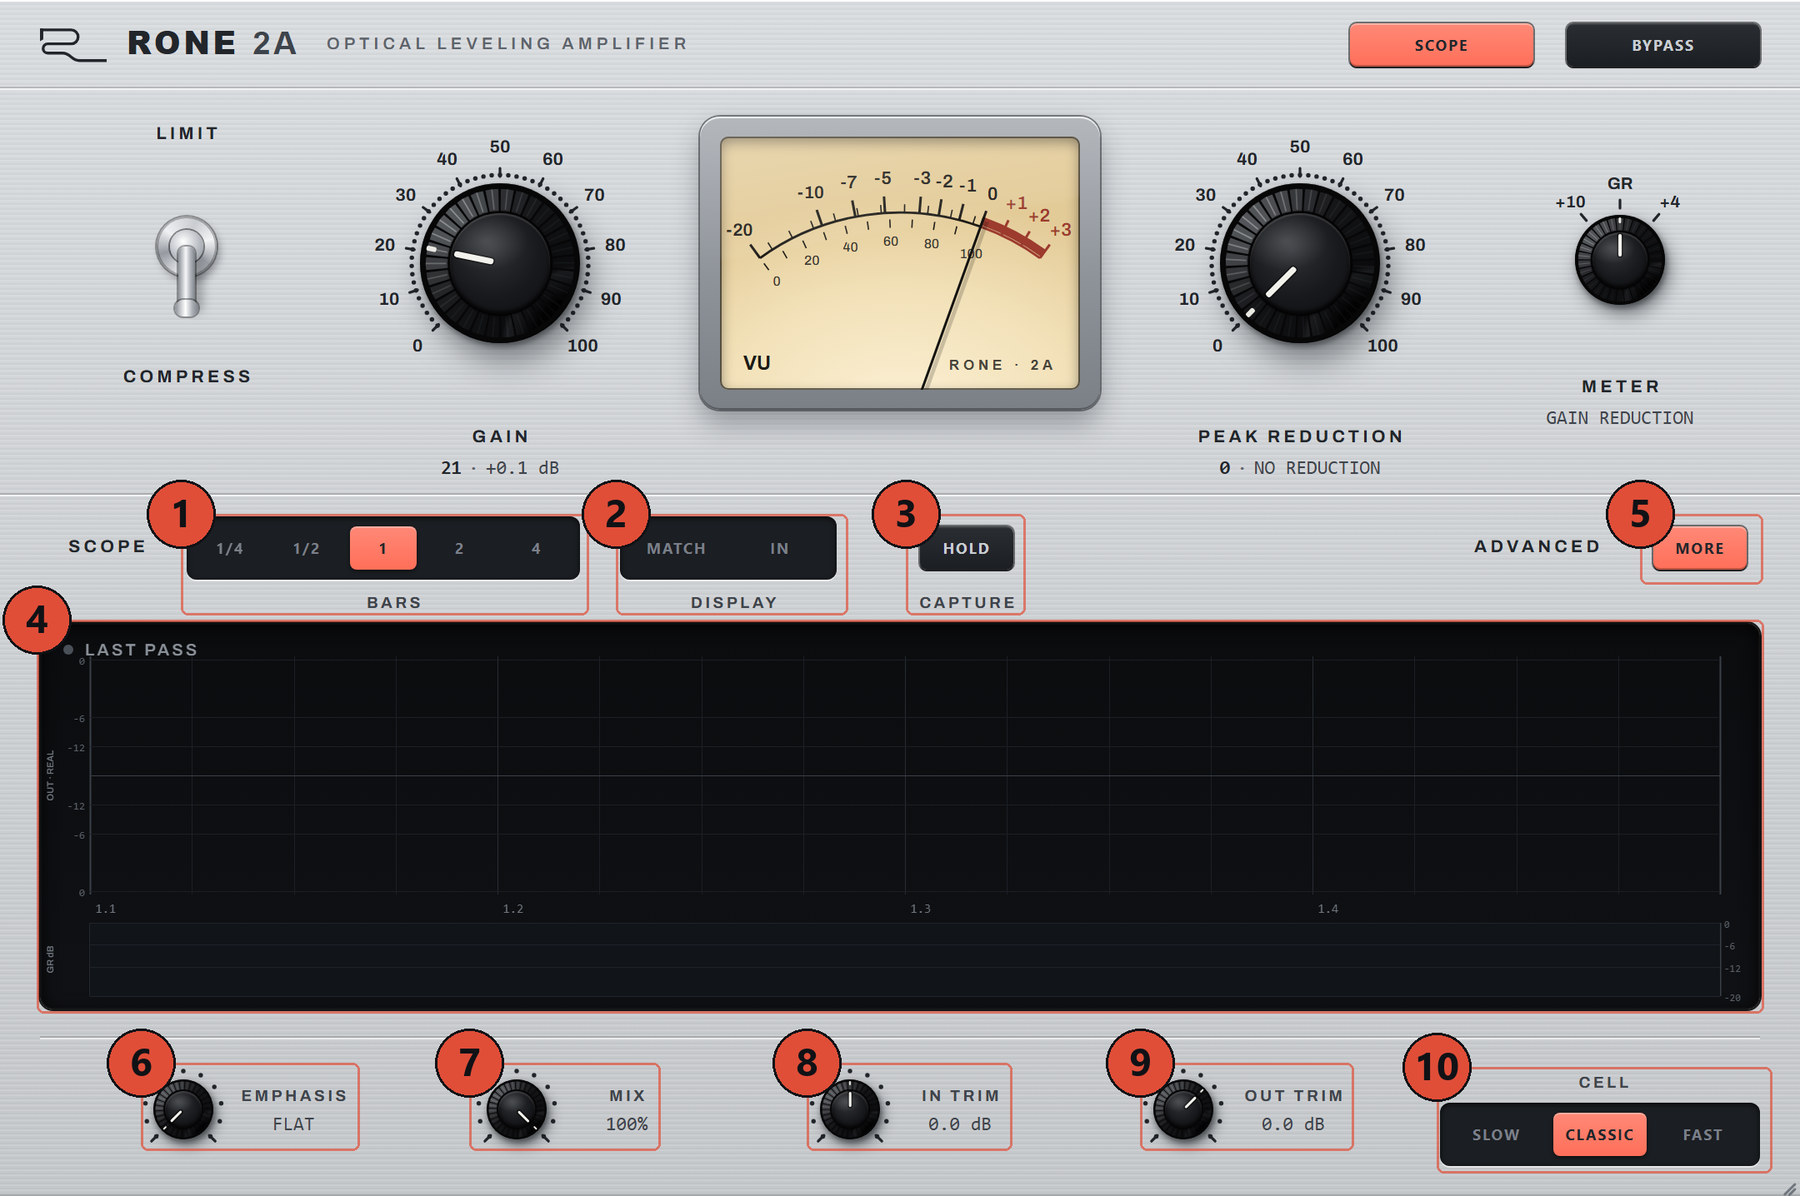
SCOPE
Opens the scope under the unit; the window grows down and remembers it with the project.
The width of the scope, locked to the song's bars while the host plays.
Draws the output at the input level - the make-up gain removed - so you see only what the leveling changed.
Draws the original signal as an outline behind the output.
Freezes the display. On the frozen screen the mouse wheel zooms, dragging scrolls and a double-click shows the whole window again. Hover the scope to read the position in the bar and the input, output and gain reduction there.
ADVANCED
Tilts the cell's detection towards the high frequencies, so bright, sibilant parts are reduced more and the low end drives it less. FLAT is the unit's standard response.
Dry against processed: lower it for parallel compression inside the plugin.
Level trims before and after the unit. IN TRIM sets how hard your track hits the cell without moving PEAK REDUCTION; OUT TRIM sets the final level.
The photocell's timing. CLASSIC is the measured silver unit. SLOW is the older, lazier cell (it grabs in about 150 ms and takes seconds to let go), for long, smooth leveling; FAST is CLASSIC letting go sooner, for parts that move quickly.
6Step-by-step workflows
The natural vocal
- COMPRESS, CELL CLASSIC.
- PEAK REDUCTION up until the loud lines read 3-6 dB of GR.
- GAIN to match the bypassed level. Open SCOPE to see the phrases come out even.
Round, even bass
- LIMIT, CELL CLASSIC or FAST.
- PEAK REDUCTION until every note reads about the same on the scope.
- MIX 100 %; GAIN to taste.
A touch of glue
- COMPRESS, CELL SLOW.
- PEAK REDUCTION for 1-2 dB of GR at most.
- Pull MIX to 50-70 % if the transients soften too much.
7Interface conventions
All RONE plugins share the same graphite interface language, so once you know one, you know them all.
| Gesture | What it does |
|---|---|
| Drag a knob up/down | Changes the value. The lit arc shows where you are in the range; the value is printed inside the knob. |
| Hold Shift while dragging | Fine adjustment. |
| Double-click a knob | Resets it to the default value. |
| Right-click a control (VST3) | Opens your DAW's automation / parameter menu for that control (for example FL Studio's Create automation clip, Link to controller). RONE never shows a browser context menu. |
| Mouse wheel | Steps through segmented switches and lists where the plugin offers them. |
| Drag the triangle in the bottom-right corner | Resizes the window. The interface scales proportionally and keeps its aspect ratio. |
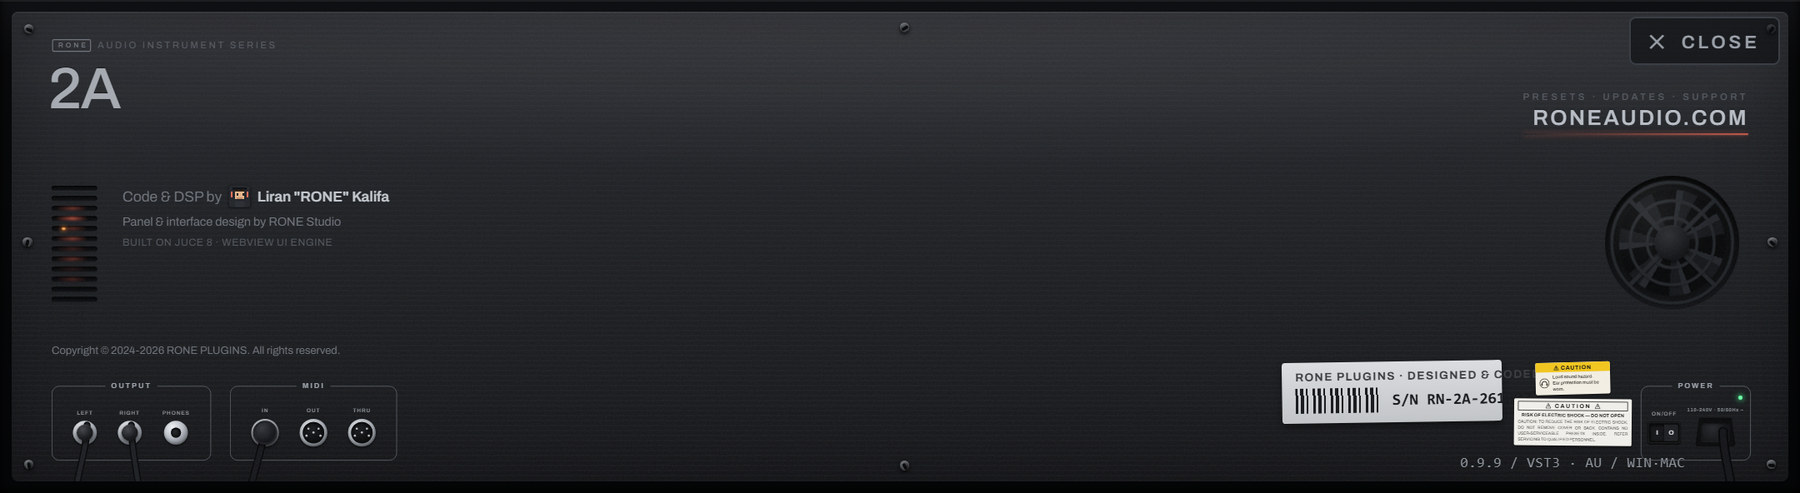
| Click the R logo / plugin name in the header | Flips the plugin over to its back panel: version, format, licence holder, a link to roneaudio.com and a DEACTIVATE button for this device. |
Automation
Every knob and switch is a host parameter. Automate it from the DAW's automation lane or by right-clicking the control inside the plugin (VST3). Values shown in the plugin always match the DAW's.
Presets and state
The plugin's full state is saved with your DAW project, so a project reopens exactly as you left it. Where the plugin has its own preset browser (the name field with ◀ ▶ arrows), factory presets are built in and your own presets are stored in your user folder.
Standalone version
The standalone app is the same plugin in its own window, useful for auditioning and exporting without a DAW. It uses your system's default audio device; when there is no DAW clock, tempo-synced controls follow the plugin's own BPM setting.
8Troubleshooting, specifications and support
Troubleshooting
| Symptom | What to do |
|---|---|
| No gain reduction | PEAK REDUCTION is at 0, or the track arrives too quietly - turn PEAK REDUCTION up or raise IN TRIM. |
| Esses jump out | Raise EMPHASIS in ADVANCED so the highs drive the cell harder. |
| The scope stays empty | It draws while the host plays. Press play; HOLD may be on. |
| Too much pumping on the bass | Use CELL SLOW, or lower PEAK REDUCTION. |
| The plugin does not appear in the DAW | Rescan plugins. On Windows the VST3 lives in C:\Program Files\Common Files\VST3\RONE; make sure that folder (or its parent) is in the DAW's VST3 search path. On macOS restart the DAW after installing; Logic and GarageBand may need a full AU rescan. |
| The window is blank or shows an error page (Windows) | The Microsoft WebView2 runtime is missing or damaged. Reinstall the RONE Plugins Center; it repairs WebView2. Also check that WebView2Loader.dll sits next to the standalone executable. |
| The window is white in Ableton Live but the standalone works (Windows) | Turn off Live's auto-scaling for this plugin: in Live's browser open Plug-Ins, right-click the plugin and untick Auto-Scale Plug-In Window, then delete the plugin from the track and insert it again. Seen with Windows display scaling at values such as 110 %. |
| A licence screen appears | Open the RONE Plugins Center, sign in, confirm your plan is active, then reopen the plugin. Check that you have not exceeded your device limit. |
| The plugin shows an older version than the Center | Close every DAW and standalone RONE app, then press UPDATE again. A running standalone keeps the old executable locked. |
| Crash | RONE plugins write a crash report to your user folder; the Center uploads it the next time it runs. Please also tell us what you did right before the crash. |
Specifications
| Product | RONE 2A |
| Version | 0.9.12 (manual revised November 2026) |
| Formats | VST3 · AU · Standalone (Windows: VST3 + Standalone; macOS: VST3 + AU + Standalone) |
| Systems | Windows 10 / 11 (64-bit) · macOS 11 or newer (Intel and Apple silicon, universal) |
| Channels | Stereo in / stereo out |
| Sample rates | 44.1 kHz to 192 kHz |
| Latency | None added by the plugin |
| Engine | JUCE 8, WebView interface (WebView2 on Windows, WebKit on macOS) |
Support
Website, presets, updates and support: roneaudio.com. When writing to us, include the plugin version (shown on the back panel), your DAW and operating system, and the steps to reproduce.