
Reverse Reverb Swells on Any Sound | RONE Reverse Reverb Complete Guide · 5 min · Watch on YouTube
1Welcome to RONE Reverse Reverb
A reverse reverb is the sound of a reverb tail played backwards: it grows out of silence and arrives exactly at the note it belongs to. Producers love it for vocal entries, risers, snare swells and transitions - and hate building it by hand, because it means bouncing, reversing, adding reverb, reversing again and nudging the result until it lands on the beat.
RONE Reverse Reverb does all of that in one step. Load a sound, choose a TAIL LENGTH in bars or note values, and the plugin renders a swell that is exactly that long at your song's tempo. Play it from the interface or with a MIDI note, drag the fade handles on the waveform to shape it, add a tempo-synced tremolo for a rhythmic riser, and export.
Where it shines
- Vocal entries - a one-bar swell of the first word before the vocal starts.
- Snare and clap swells - 1/4 or 1/2 tails into every second bar.
- Risers - 4- or 8-bar tails with the TREMOLO in RAMP mode.
- Transitions - TRANSITION mode glues the swell to the original hit with a shared reverb.
The 10-second version
- Drop a short sound (up to 8 seconds) on the waveform.
- Set TAIL LENGTH to the number of bars the swell should take.
- Press PLAY.
- Drag the result to your DAW, or leave the plugin on the channel: the file is saved with the project.
2Installation with the RONE Plugins Center
Every RONE product is installed, updated and licensed through one application: the RONE Plugins Center. You never download individual installers by hand, and you never enter serial numbers into the plugin itself.
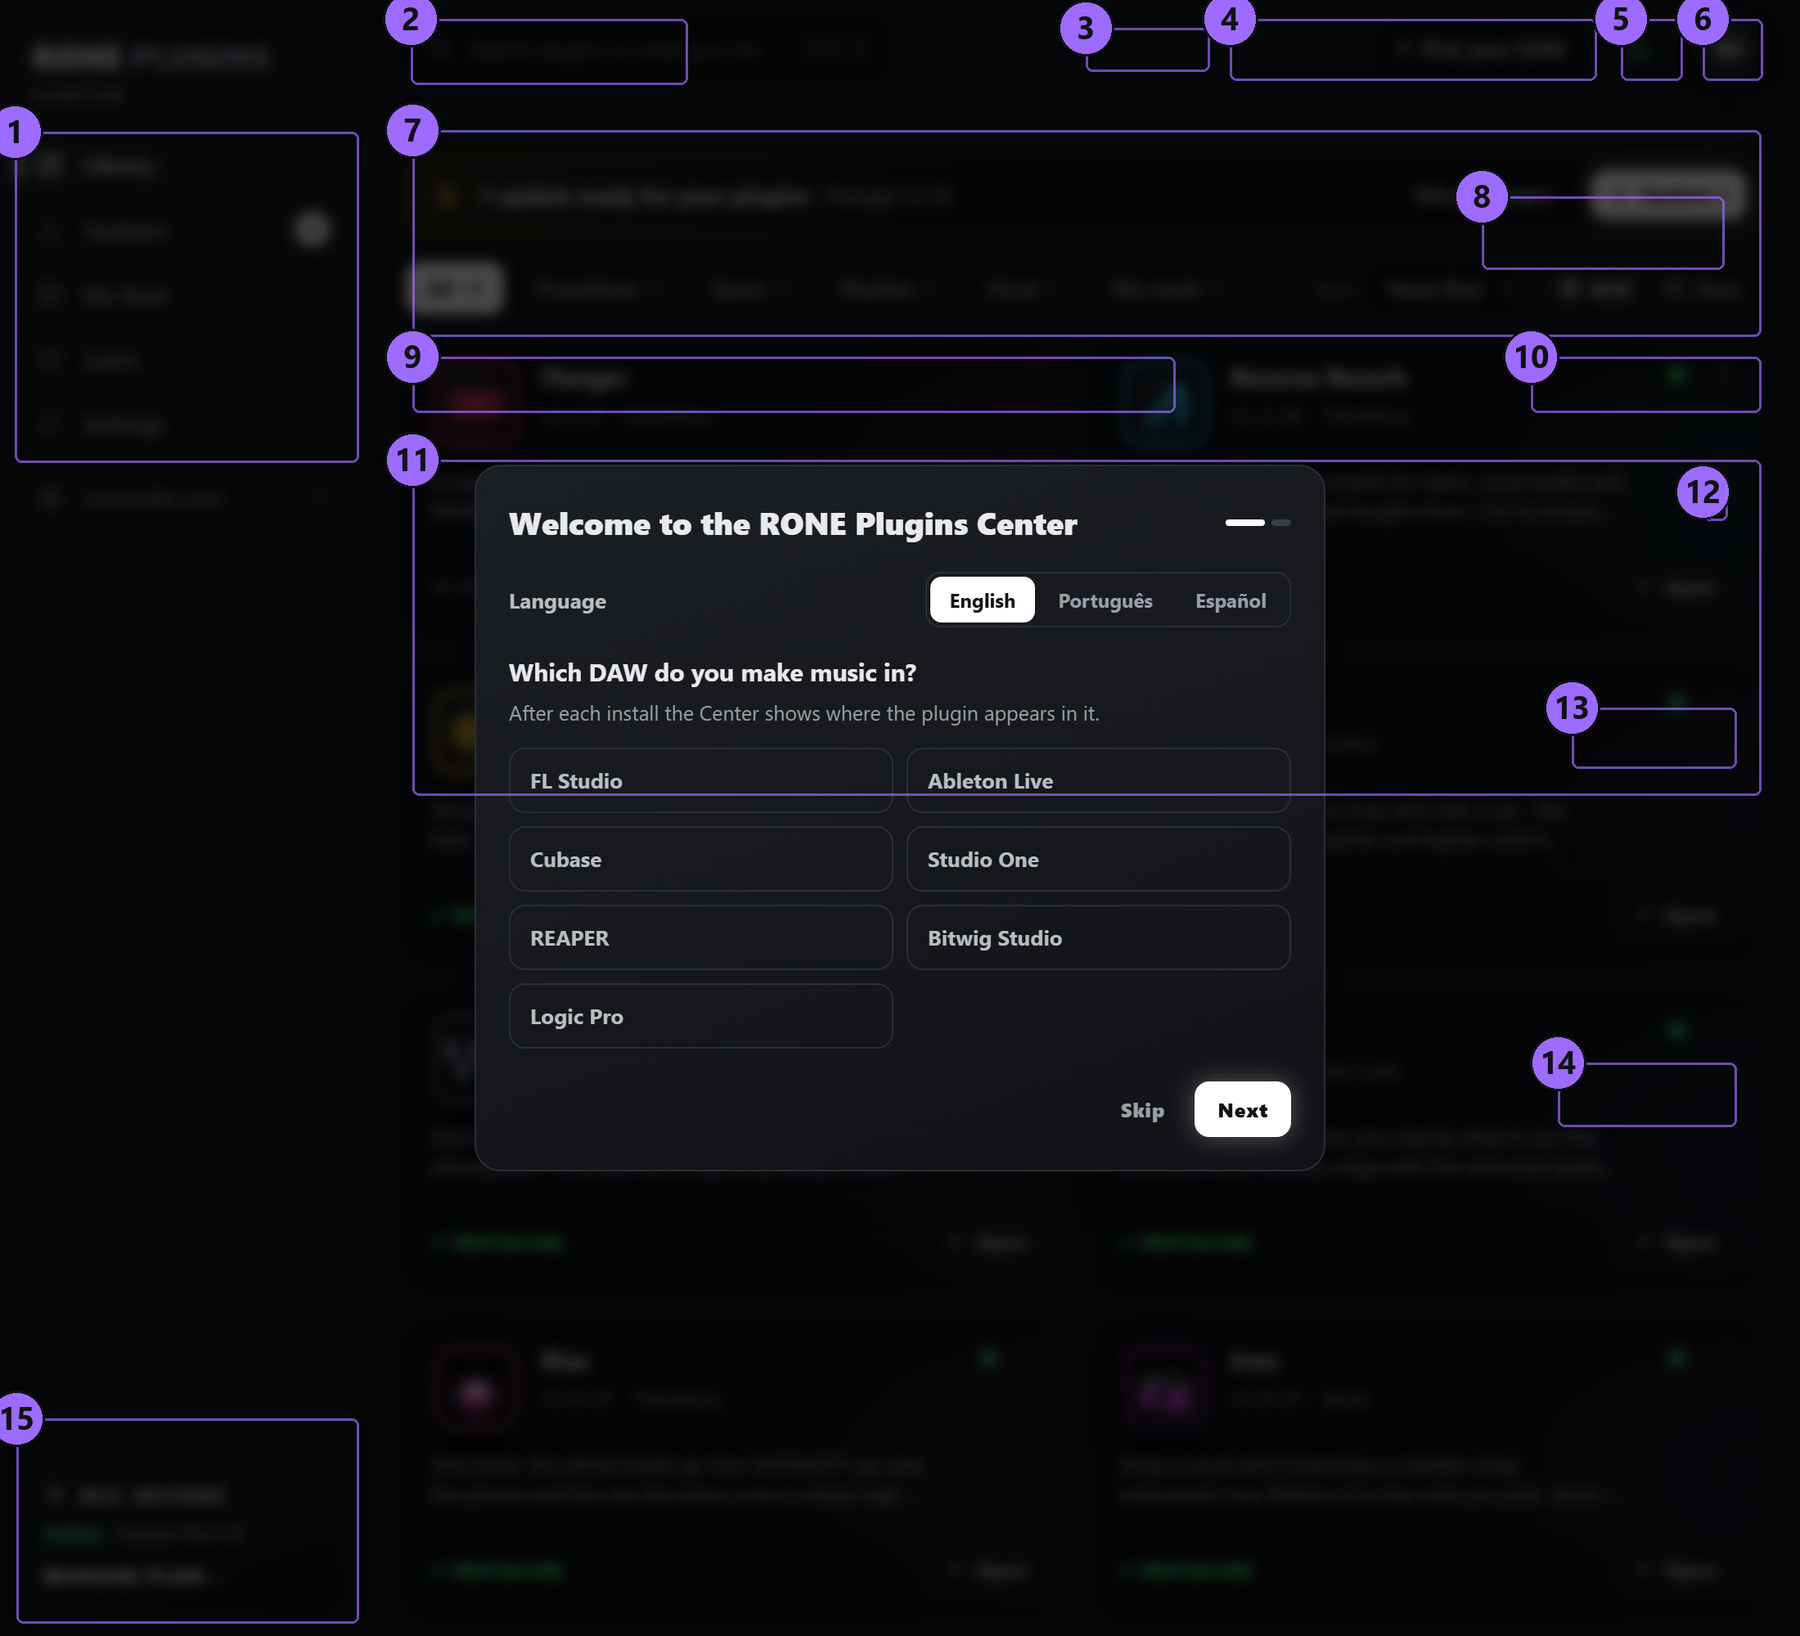
Step by step
- Download the Center from roneaudio.com and run the installer (Windows:
RONE_Plugins_Center_Installer.exe, macOS:RONE_Plugins_Center.dmg). On Windows the installer also adds the Microsoft WebView2 runtime if your PC does not have it yet; it is required for the plugin interfaces. On macOS (10.15 Catalina or later, Intel and Apple Silicon) open the .dmg and drag the Center onto Applications. It is signed and notarized by Apple, so macOS only asks once whether you want to open an app downloaded from the internet: press Open. - Open the Center and sign in with your roneaudio.com account (the same e-mail and password you used on the website). Your licences and device slots are checked automatically: an active ALL ACCESS plan unlocks every plugin, and a lifetime licence unlocks the plugin it was bought for — so RONE Reverse Reverb opens either way.
- Find RONE Reverse Reverb in the list and press INSTALL. The Center downloads the signed installer, verifies its checksum, installs it silently and registers the version.
- When the card shows INSTALLED, start (or restart) your DAW and rescan plugins if it does not pick up new plugins automatically. All RONE plugins appear next to each other in your plugin list because every name starts with RONE.
- Updates appear on the same card. Press UPDATE on one plugin or UPDATE ALL at the top. Close the standalone version of a plugin before updating it.
Where the files go
Windows
| File | Location |
|---|---|
| VST3 | C:\Program Files\Common Files\VST3\RONE\RONE Reverse Reverb.vst3 |
| Standalone app | C:\Program Files\RONE Plugins\RONE Reverse Reverb.exe |
| This manual | C:\Program Files\RONE Plugins\Manuals\ |
macOS
| File | Location |
|---|---|
| VST3 | /Library/Audio/Plug-Ins/VST3/RONE Reverse Reverb.vst3 |
| Audio Unit | /Library/Audio/Plug-Ins/Components/RONE Reverse Reverb.component |
| Standalone app | /Applications/RONE Reverse Reverb.app |
| This manual | /Users/Shared/RONE Plugins/Manuals/ |
Licence and activation
Licensing is tied to your account, not to a key. The plugin checks the licence file that the Center writes when you sign in. There are two ways to own it: an ALL ACCESS plan, which unlocks every RONE plugin for as long as it is active, or a lifetime licence for this plugin alone, which never expires. Either one opens RONE Reverse Reverb, and buying the lifetime licence later does not disturb a plan you already have.
If a plugin ever shows a RONE Bundle License Required screen, open the Center, make sure you are signed in and the plugin shows as licensed, then reopen it. Two devices can be signed in at the same time on either kind of licence; sign out on an old machine from the Center's Account page to free a slot. A lifetime licence keeps working offline for far longer than a plan does — there is nothing for it to expire against — but the Center still needs to reach the internet occasionally to confirm it.
Uninstalling
Windows: Settings → Apps → RONE Reverse Reverb (RONE). macOS: delete the bundles listed above. Presets and settings in your user folder are kept.
3Quick start
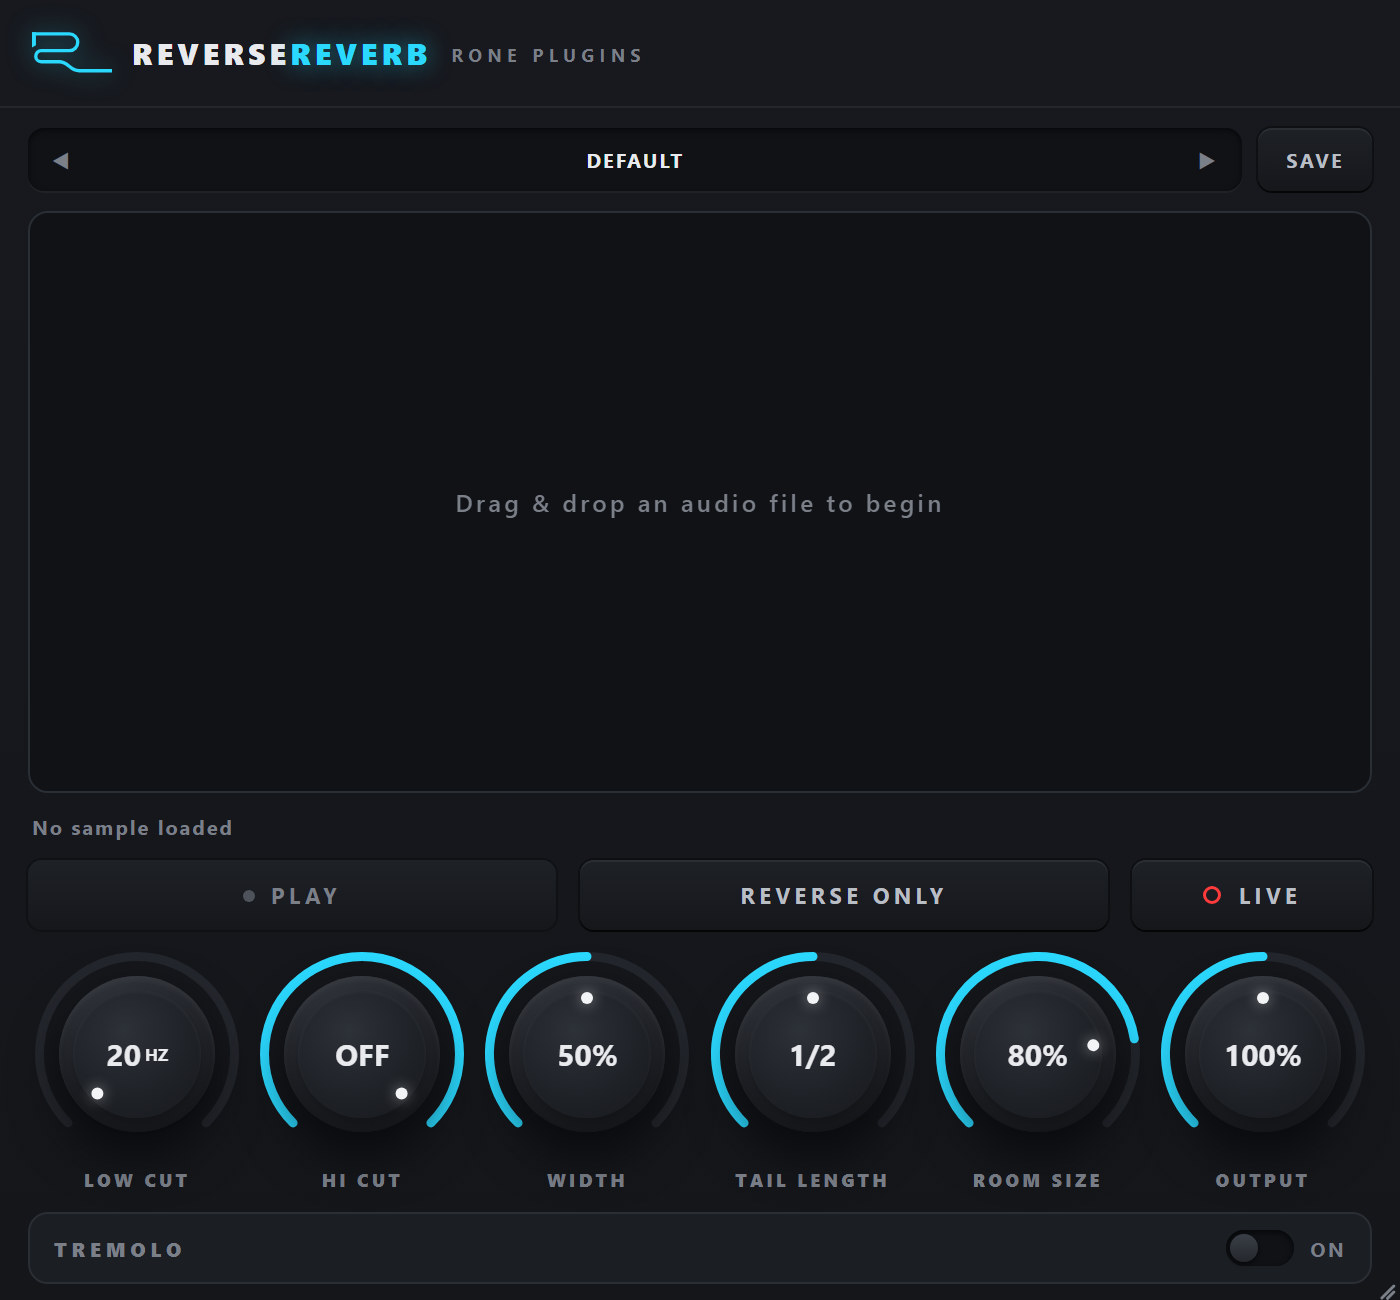
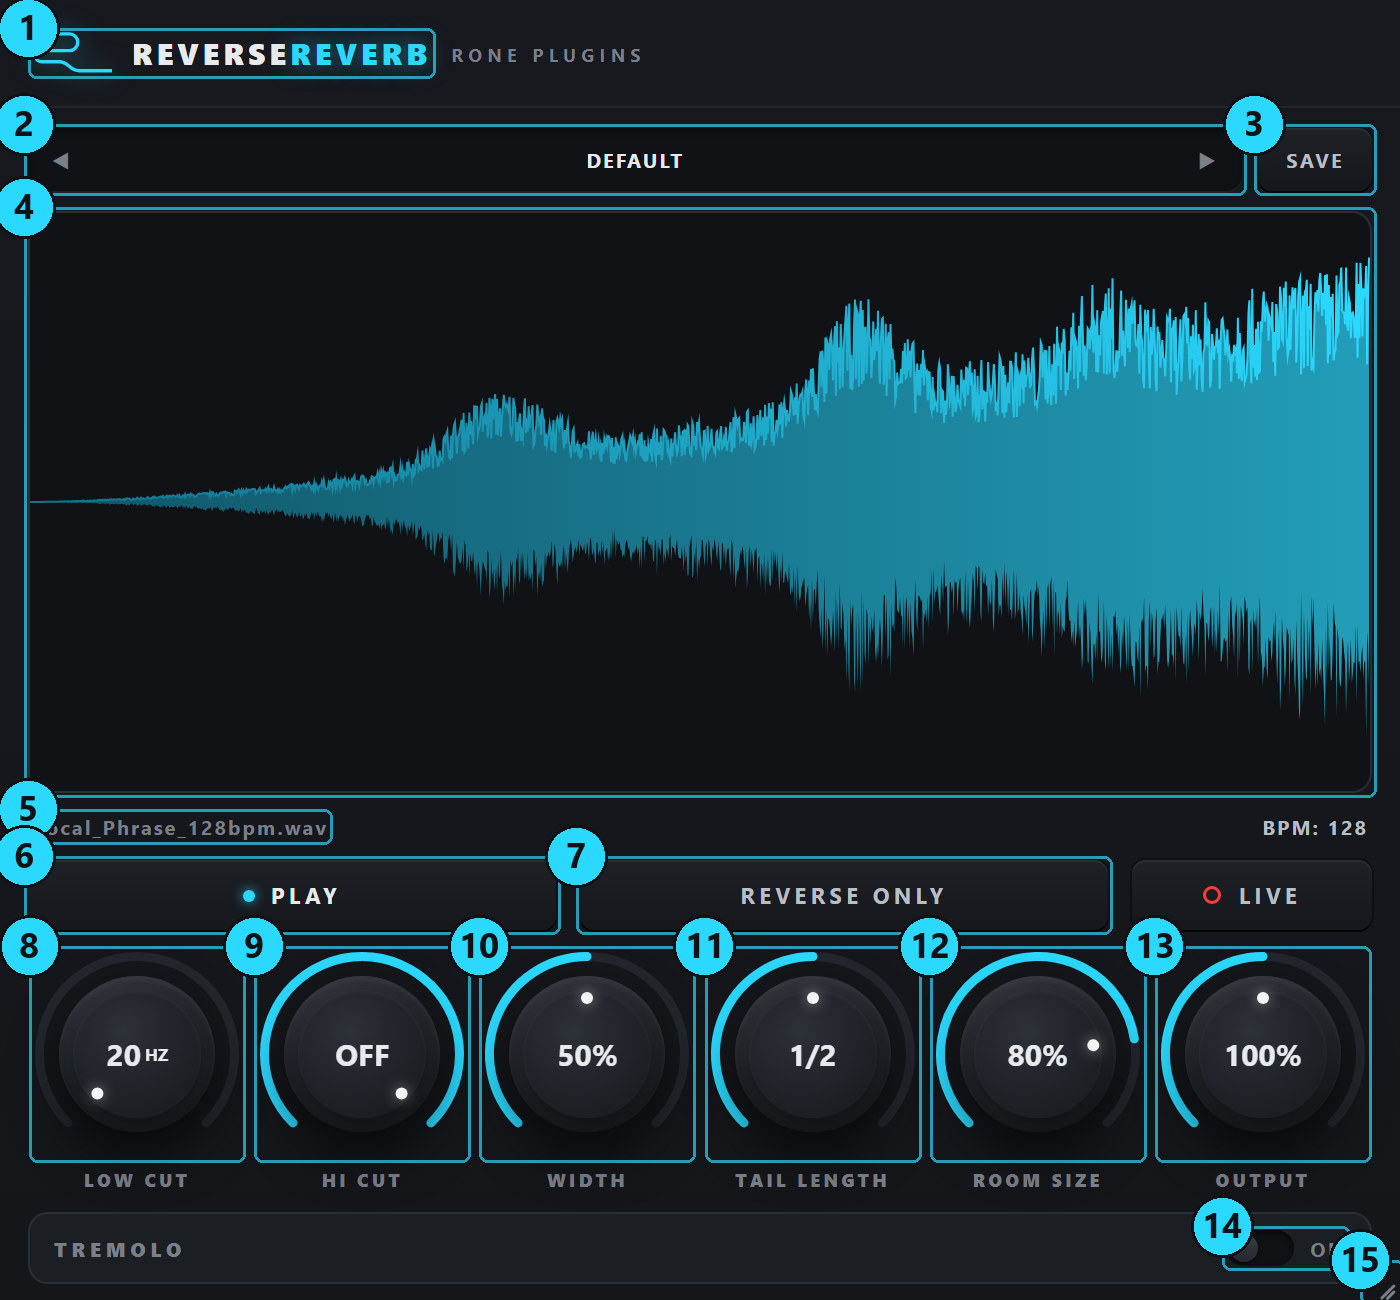
- Insert the plugin on a channel (an empty channel is ideal, since the plugin plays its result through it). In the standalone app just open it.
- Load a sound. Drag a WAV, AIFF, FLAC or MP3 of up to 8 seconds onto the waveform. Short, distinct sounds - a word, a snare, a chord stab - give the clearest swells.
- Choose the length. TAIL LENGTH runs from 1/32 to 8 BAR. It is the total length of the result at the current tempo (host tempo in a DAW; the BPM slider in the standalone app).
- Set the room. ROOM SIZE controls how dense and long the reverb is inside that length; LOW CUT removes rumble from the tail; WIDTH sets how wide the swell is.
- Listen. Press PLAY. In a DAW you can also trigger playback with any MIDI note routed to the plugin - note on starts, note off stops.
- Shape it. Drag the fade handles on the left and right edges of the waveform to fade the result in and out, and drag the small curve dots to bend the fades.
- Choose the mode. REVERSE ONLY renders the reversed tail alone. TRANSITION renders the reversed tail followed by the original sound with a matching forward reverb - the complete 'swell into the hit'.
- Add rhythm (optional). Turn the TREMOLO on. In RAMP mode it chops the swell faster and faster towards the end - the classic riser.
- Export. Drag the waveform out of the plugin into your DAW. The clip is saved to
Documents\RONE Plugins\Exports\RONE Reverse Reverb\first and that permanent file is what the DAW receives, so the project can always find it again.
4Interface tour
5Controls reference
Source and playback
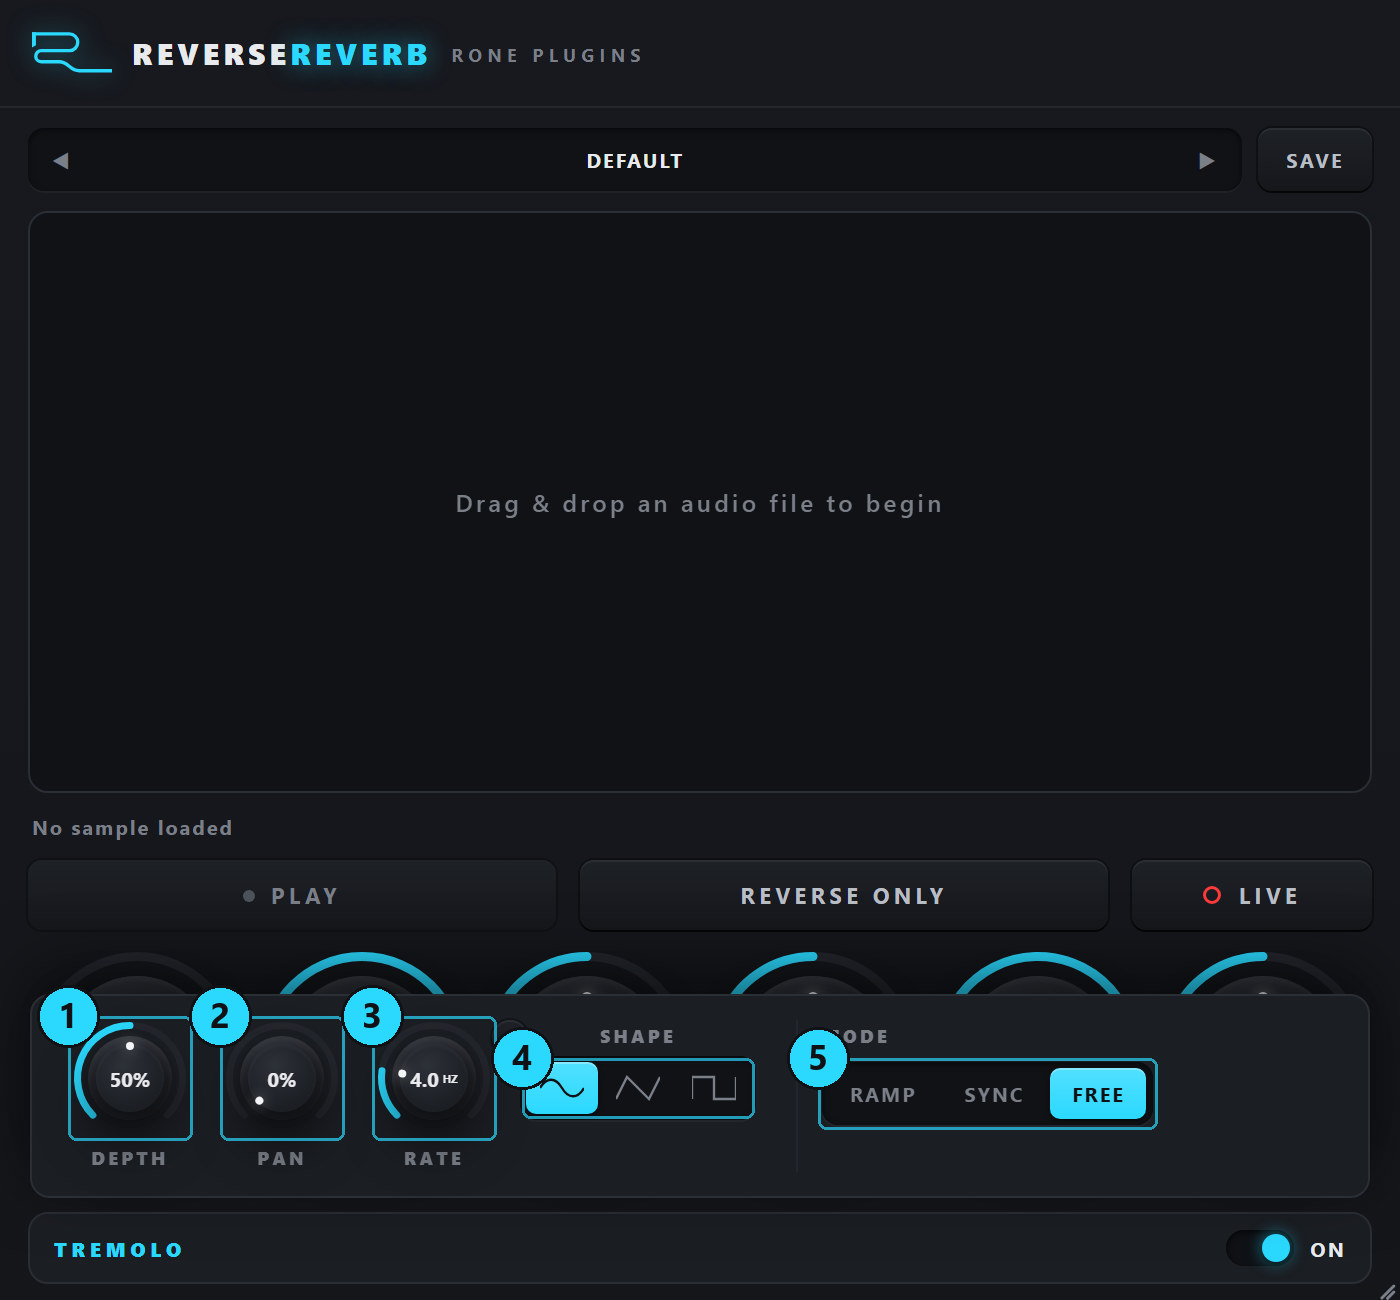
Drop files here. Once a sound is loaded it shows the reversed result. Drag the handle at the left edge to set FADE IN and the handle at the right edge to set FADE OUT; drag the small dots to change the fade curve from logarithmic to exponential. The playback cursor moves across the waveform while playing.
Plays the rendered result. In a DAW, MIDI note on also triggers playback and note off stops it, so you can place a MIDI note where the swell should start.
Press on the waveform and drag into your DAW's arrangement (or into Explorer / Finder). The rendered clip is written to Documents\RONE Plugins\Exports\RONE Reverse Reverb\ as <source>_ReverseReverb_<date>_<time>.wav at the session's sample rate, and never deleted by the plugin.
REVERSE ONLY: the output is the reversed reverb tail; the original sound is not included. TRANSITION: the reversed tail is followed by the original sound, itself sent through the same reverb forwards - swell, hit and decay in one clip, already glued.
Main knobs

The total length of the rendered result at the current tempo. This is what makes the swell land: an 8 BAR tail dropped eight bars before the downbeat arrives exactly on it.
The size of the reverb used to create the tail. Larger rooms give denser, smoother swells; small rooms give short, grainy pre-echoes that still stretch to the chosen length.
A high-pass filter on the result. Reversed tails carry a lot of low-mid rumble; 100-200 Hz keeps the swell out of the way of bass and kick.
Stereo width of the result. 0 % is mono, 50 % is the natural reverb width, 100 % is as wide as it goes.
A low-pass filter on the result. Reversed tails are bright by nature; 4-8 kHz makes a dark, cinematic swell that sits behind a lead instead of fighting it.
The level of the result. Above 100 % a soft limiter takes over: the loud end of a swell rounds off instead of clipping, so a hot OUTPUT is a colour, not a fault.
Tremolo

Enables a rhythmic amplitude gate on the result - the difference between a swell and a riser.
How deep the tremolo cuts. 100 % is a hard gate.
Turns the tremolo into an auto-pan: alternate pulses lean left and right by this amount.
Speed of the tremolo in FREE mode. In RAMP and SYNC modes the speed comes from the tempo and this knob is inactive.
REC (the small red dot on the knob, 1.1.7) records the knob into the sample: click it (it blinks), press PLAY and turn RATE while the swell plays. The movement is recorded across the whole sample, and from then on the tremolo follows the take in the preview, in the waveform and in the dragged file; the knob turns red and follows the take while it plays. Click REC again to record a new take. Turning RATE by hand replaces the take with a plain knob again. The take is saved with the project.
The shape of the pulse. Sine is smooth, triangle is sharper, square is a hard gate.
RAMP starts at the FROM division and accelerates to the TO division across the length of the tail - the accelerating riser gate. SYNC holds one tempo-synced division for the whole tail. FREE runs at the RATE in Hz.
The tempo divisions the tremolo runs at. In RAMP mode FROM is the starting speed and TO the speed reached at the end of the tail.
Standalone extras
A slider row appears under the knobs in the standalone app, because there is no host tempo to read. Set it to your song's tempo before exporting.
Presets and the project
The arrows step through the presets; click the name for the list: Default, Dreamy Pad, Short Impact, Cinematic Swell, Dark Atmosphere, Bright Shimmer, Transition Rise, Tremolo Wash, Pulsing Reverse, Lo-Fi Reverse, Snare Swell and Wide Hall, then your own. SAVE stores the current settings under a name of your choice; user presets can be deleted from the list. A preset sets the render (tail, room, filters, mode) and the tremolo; the loaded sound stays.
6Step-by-step workflows
Vocal entry swell
- Bounce the first word of the vocal (or the first second of the phrase) and drop it on the plugin.
- TAIL LENGTH 1 BAR, ROOM SIZE 85 %, LOW CUT 150 Hz, WIDTH 60 %. Mode REVERSE ONLY.
- Fade out the last 10 % with the right handle so the swell does not step on the real vocal.
- Place the result so it ends exactly where the vocal starts. Send it to the same reverb as the vocal.
Snare swell every second bar
- Drop the snare sample, or pick the SNARE SWELL preset. TAIL LENGTH 1/2, ROOM SIZE 50 %, LOW CUT 80 Hz.
- Trigger it with a MIDI note half a bar before every second snare, or drag the result into the arrangement and repeat it.
8-bar riser with tremolo
- Drop a chord stab or a held vocal note. TAIL LENGTH 8 BAR, ROOM SIZE 100 %, WIDTH 80 %.
- TREMOLO on, DEPTH 80 %, SHAPE square, MODE RAMP, FROM 1/4, TO 1/32, PAN 40 %.
- Fade in the first 30 % with the left handle. Place the result so it ends on the drop.
Transition hit
- Drop a crash, a vocal shout or an impact. Mode TRANSITION.
- TAIL LENGTH 2 BAR, ROOM SIZE 90 %. The result is the swell, the hit and a forward tail in one clip.
- Align the point where the swell ends with the downbeat of the new section.
7Recommendations
Do
- Feed it short, clean sounds. The plugin stretches the reverb to the chosen length, so the source only needs to define the character.
- Use LOW CUT generously - a reversed tail without low end sits behind the mix instead of on top of it.
- Trigger with MIDI when you want the swell to follow arrangement edits; drag the file when you want to edit it as audio.
- Re-render after changing the song tempo; the length is baked in at render time.
- Try TRANSITION mode on drum hits; the shared reverb makes the hit sound like it belongs to the swell.
Avoid
- Files longer than 8 seconds; the plugin refuses them. Trim in your DAW first.
- WIDTH at 100 % on low-frequency material; it can cancel in mono.
- Deep square tremolo on soft pads; sine or triangle keeps the swell musical.
Sound tips
- Room size is texture, length is timing. A small room stretched to 4 bars sounds like a grainy pre-echo; a large one like a smooth cloud. The timing is identical.
- Two swells - one 1 BAR, one 1/4 - layered into the same downbeat give both build and snap.
- PAN at 100 % with a fast TO value spins the end of a riser around the listener.
8Interface conventions
All RONE plugins share the same graphite interface language, so once you know one, you know them all.
| Gesture | What it does |
|---|---|
| Drag a knob up/down | Changes the value. The lit arc shows where you are in the range; the value is printed inside the knob. |
| Hold Shift while dragging | Fine adjustment. |
| Double-click a knob | Resets it to the default value. |
| Right-click a control (VST3) | Opens your DAW's automation / parameter menu for that control (for example FL Studio's Create automation clip, Link to controller). RONE never shows a browser context menu. |
| Mouse wheel | Steps through segmented switches and lists where the plugin offers them. |
| Drag the triangle in the bottom-right corner | Resizes the window. The interface scales proportionally and keeps its aspect ratio. |
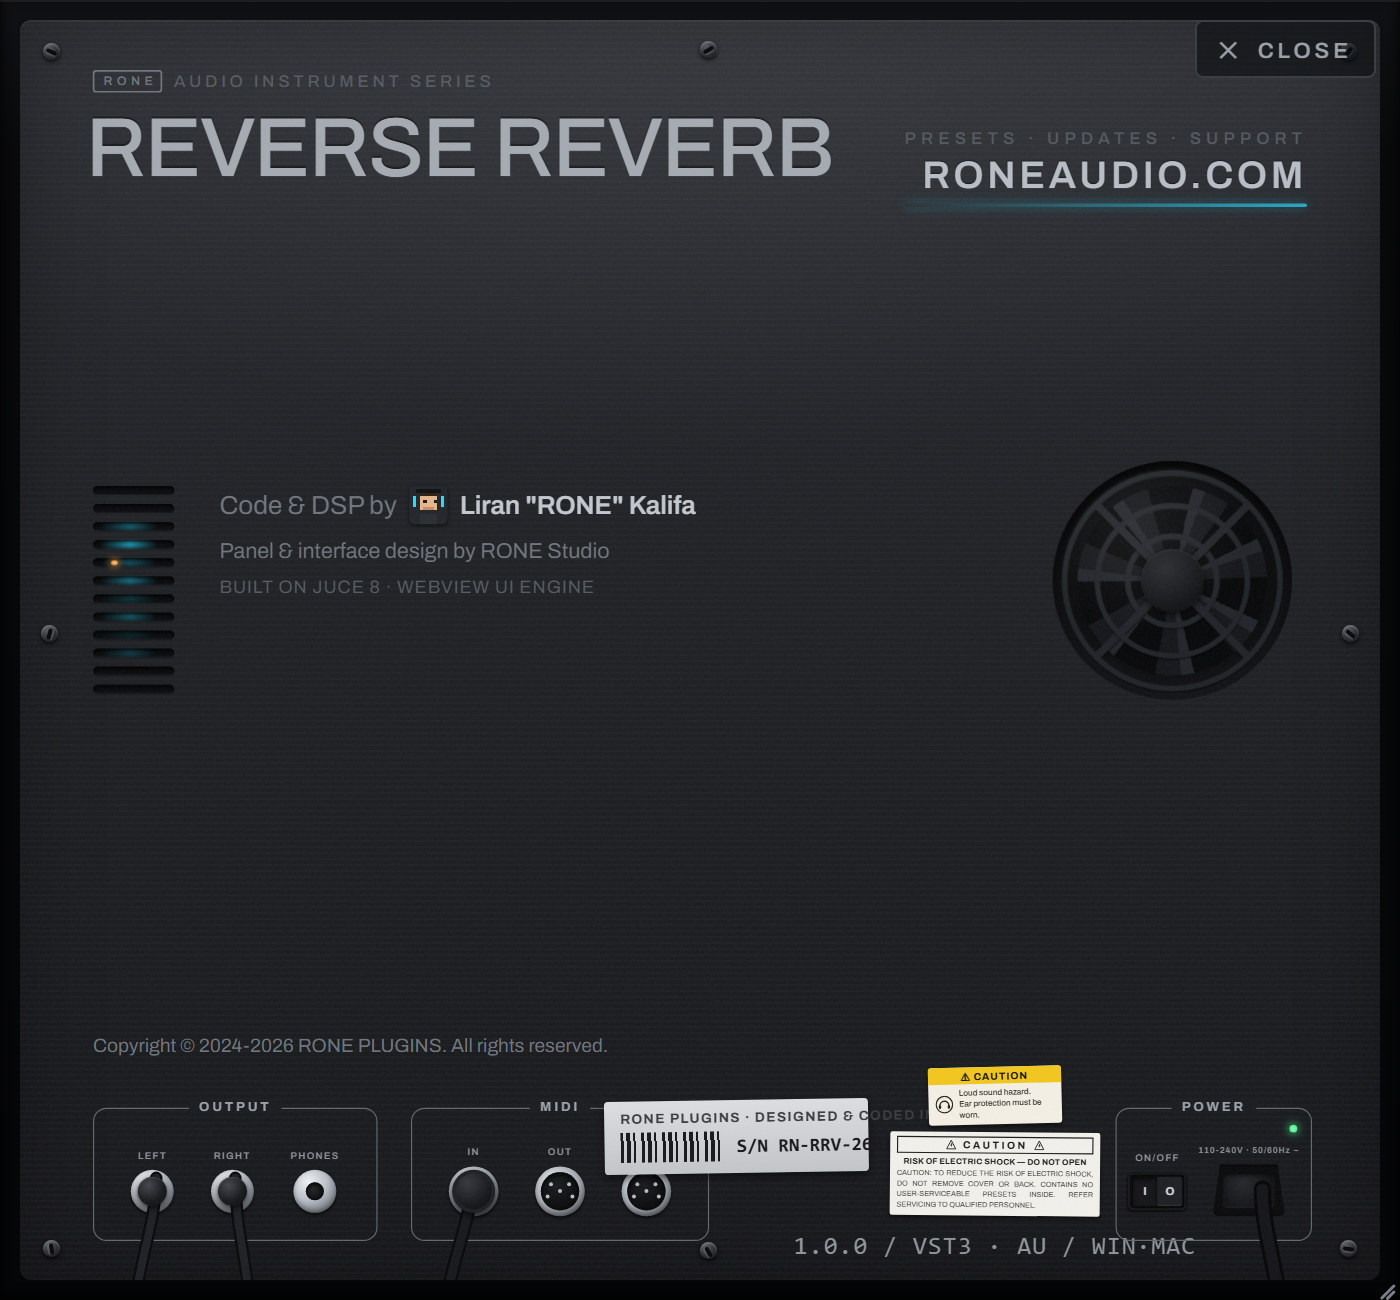
| Click the R logo / plugin name in the header | Flips the plugin over to its back panel: version, format, licence holder, a link to roneaudio.com and a DEACTIVATE button for this device. |
Automation
Every knob and switch is a host parameter. Automate it from the DAW's automation lane or by right-clicking the control inside the plugin (VST3). Values shown in the plugin always match the DAW's.
Presets and state
The plugin's full state is saved with your DAW project, so a project reopens exactly as you left it. Where the plugin has its own preset browser (the name field with ◀ ▶ arrows), factory presets are built in and your own presets are stored in your user folder.
Standalone version
The standalone app is the same plugin in its own window, useful for auditioning and exporting without a DAW. It uses your system's default audio device; when there is no DAW clock, tempo-synced controls follow the plugin's own BPM setting.
9Troubleshooting, specifications and support
Troubleshooting
| Symptom | What to do |
|---|---|
| The file does not load | Files longer than 8 seconds are rejected. Trim the sound in your DAW and try again. WAV, AIFF, FLAC and MP3 are supported. |
| The swell does not land on the beat | Check the tempo shown next to the status line. In the standalone app set the BPM slider; in a DAW the host tempo is used - re-render if you changed it. |
| PLAY is greyed out | No sound is loaded yet, or the render is still running (very long tails take a moment). |
| The swell sounds a semitone or so too high or too low | Fixed in 1.0.1: files are now resampled to the session's sample rate. If an old project still sounds off, re-drop the source file once. |
| The DAW says a dropped clip is missing | Clips are saved to Documents\RONE Plugins\Exports\RONE Reverse Reverb; point the DAW there. Versions before 1.0.1 wrote to the temp folder - re-export those clips once. |
| I hear nothing when I send MIDI | The MIDI must reach the plugin's channel; in some DAWs an effect plugin needs a MIDI routing or a 'MIDI to plugin' setting. The PLAY button works regardless. In Logic: see MIDI in Logic Pro in Interface conventions. |
| The plugin does not appear in the DAW | Rescan plugins. On Windows the VST3 lives in C:\Program Files\Common Files\VST3\RONE; make sure that folder (or its parent) is in the DAW's VST3 search path. On macOS restart the DAW after installing; Logic and GarageBand may need a full AU rescan. |
| The window is blank or shows an error page (Windows) | The Microsoft WebView2 runtime is missing or damaged. Reinstall the RONE Plugins Center; it repairs WebView2. Also check that WebView2Loader.dll sits next to the standalone executable. |
| The window is white in Ableton Live but the standalone works (Windows) | Turn off Live's auto-scaling for this plugin: in Live's browser open Plug-Ins, right-click the plugin and untick Auto-Scale Plug-In Window, then delete the plugin from the track and insert it again. Seen with Windows display scaling at values such as 110 %. |
| A licence screen appears | Open the RONE Plugins Center, sign in, confirm your plan is active, then reopen the plugin. Check that you have not exceeded your device limit. |
| The plugin shows an older version than the Center | Close every DAW and standalone RONE app, then press UPDATE again. A running standalone keeps the old executable locked. |
| Crash | RONE plugins write a crash report to your user folder; the Center uploads it the next time it runs. Please also tell us what you did right before the crash. |
Specifications
| Product | RONE Reverse Reverb |
| Version | 1.2 (manual revised November 2026) |
| Formats | VST3 · AU · Standalone (Windows: VST3 + Standalone; macOS: VST3 + AU + Standalone) |
| Systems | Windows 10 / 11 (64-bit) · macOS 11 or newer (Intel and Apple silicon, universal) |
| Channels | Stereo in / stereo out |
| Sample rates | 44.1 kHz to 192 kHz |
| Latency | None (offline render, playback only) |
| Engine | JUCE 8, WebView interface (WebView2 on Windows, WebKit on macOS) |
Support
Website, presets, updates and support: roneaudio.com. When writing to us, include the plugin version (shown on the back panel), your DAW and operating system, and the steps to reproduce.